Scan & Sleep Setup Guide

Set up your property in a few simple steps

Create your owner account, add all rooms, print the permanent QR cards and confirm the first Do Not Disturb activation.

1

Owner account

Create and confirm your account

Begin from the Scan & Sleep login page and select Create account.
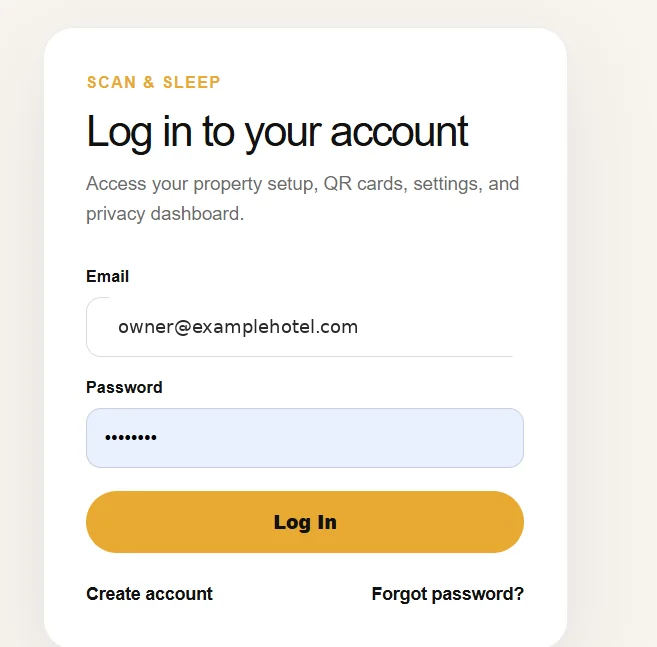
Enter the owner email address.
Choose a secure password.
Use the eye icon to show or hide the password while typing.
Open the confirmation email and confirm the new account.
After confirming the email, Scan & Sleep opens the Create Property page.
Scan and Sleep owner login page
Owner login and account access
2

Property setup

Add the property and every room

Add the official property name and enter each room on a separate line.
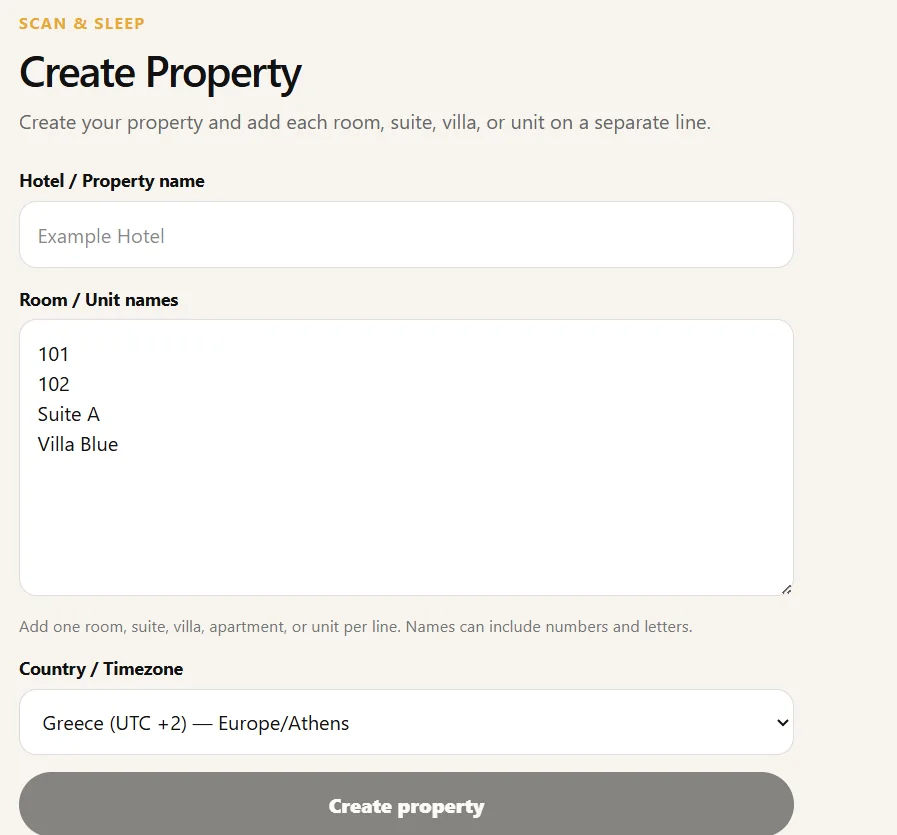
Enter the property name shown to guests and staff.
Add every room number or room name, one per line.
Select the correct country and timezone.
Select Create property.
Use the real and complete room list during the trial. This ensures that the correct annual plan can be identified later.
Create Property form with room list and timezone
Add rooms one per line
3

Owner Dashboard

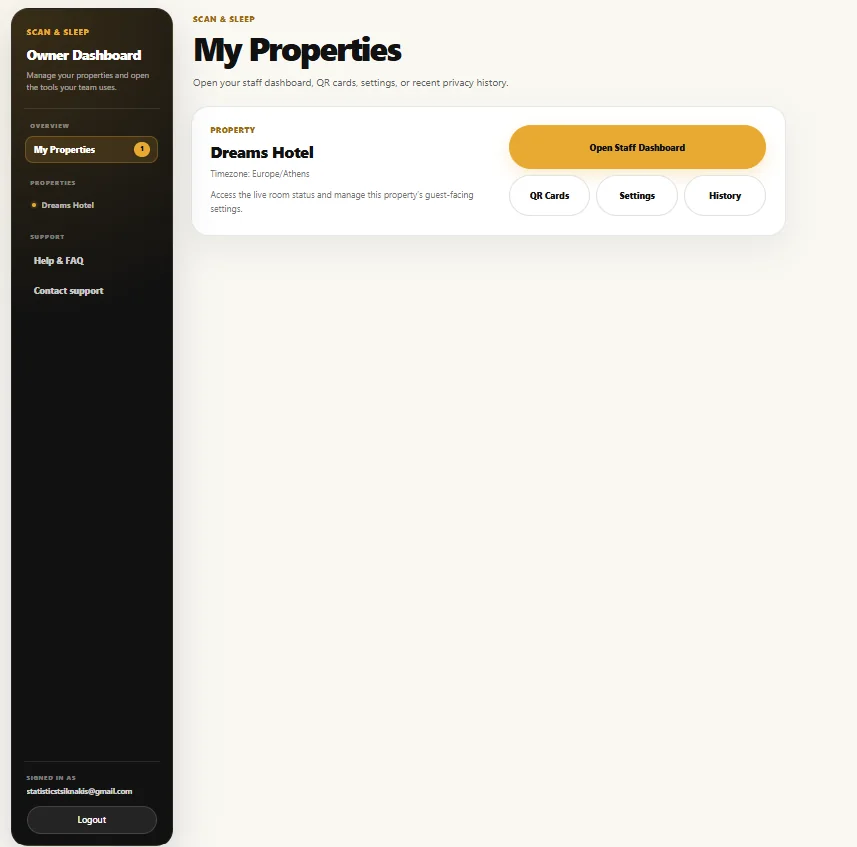
Continue to My Properties

After setup, confirm the number of rooms created and continue directly to the Owner Dashboard.
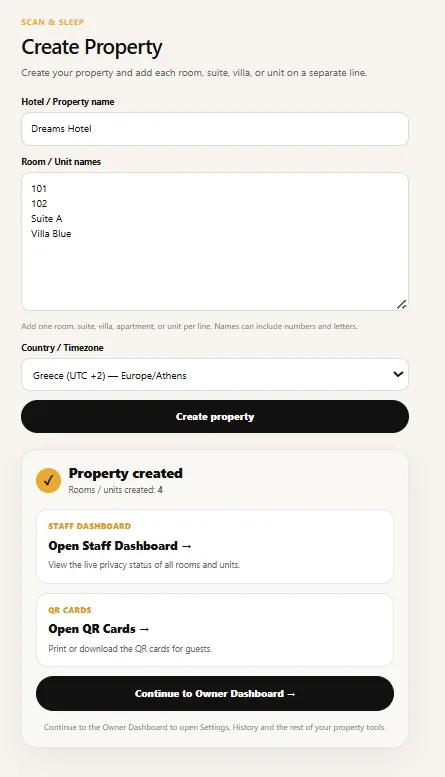
Check that the room count is correct.
Select Continue to Owner Dashboard.
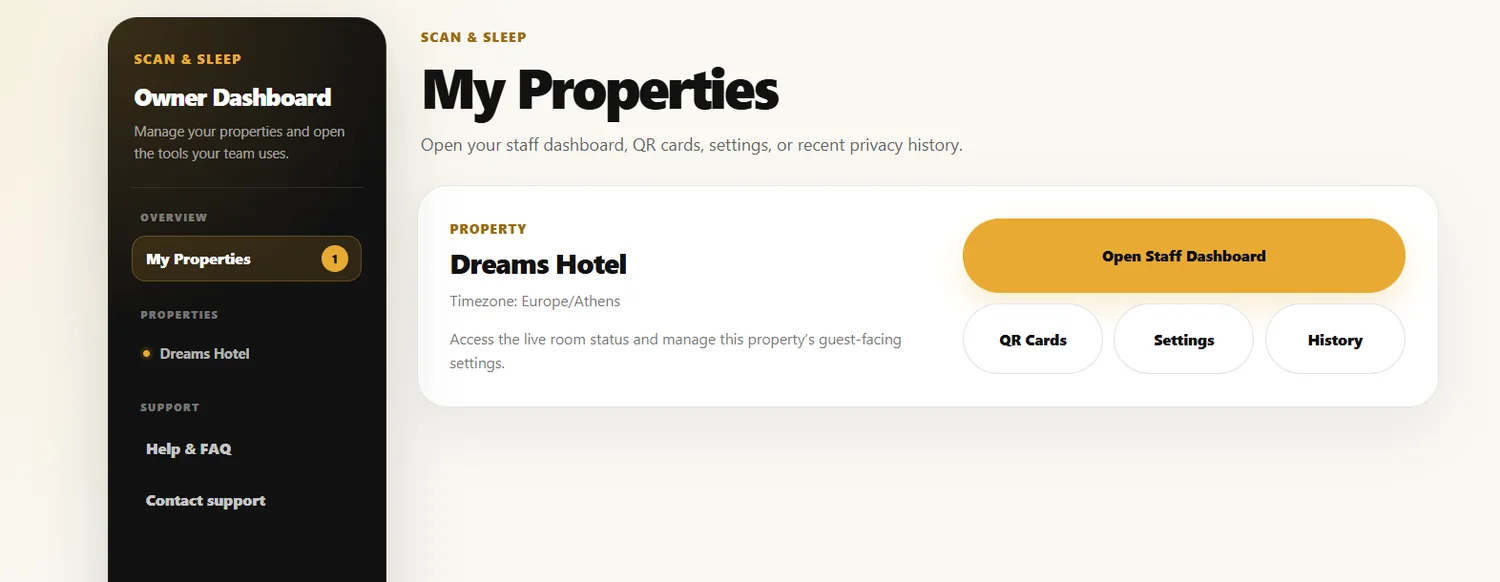
Confirm that the new property appears under My Properties.
Use the property card to access all available tools.
Property created confirmation
Property created
Scan and Sleep Owner Dashboard
My Properties
4

Permanent room QR codes

Print the QR cards

Every room receives its own permanent QR code.
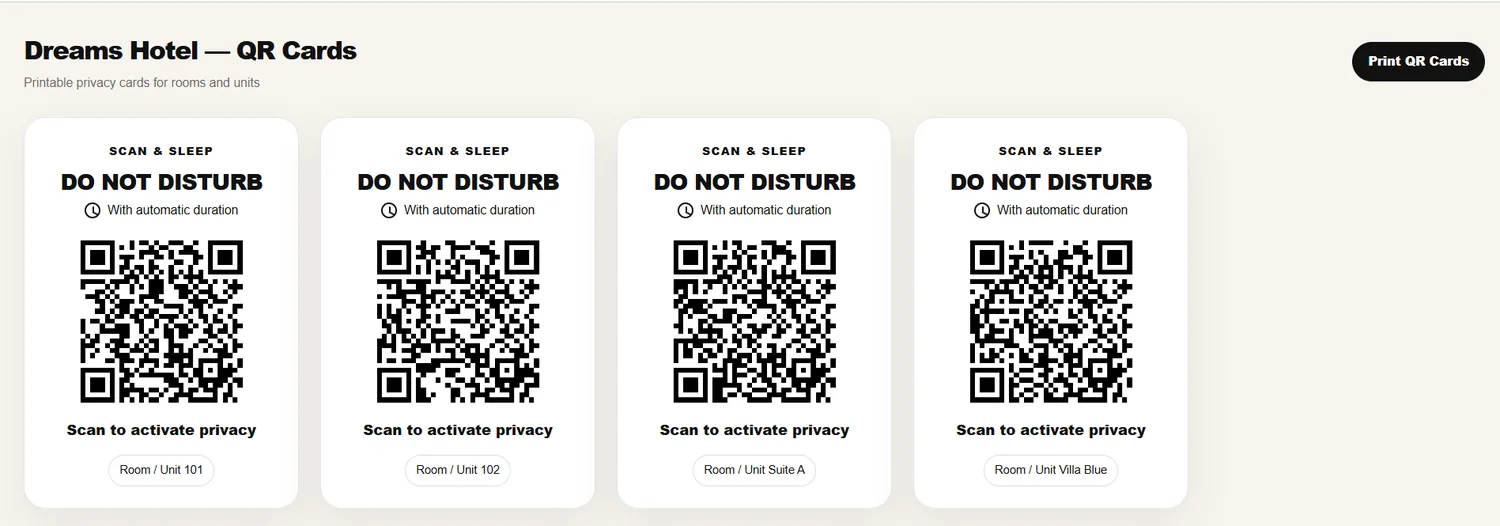
Open QR Cards from the property card.
Select Print QR Cards.
Print directly or save the cards as a PDF.
Place each card in the matching room.
The QR code remains valid even when a room display name is changed later.
Printable Scan and Sleep room QR cards
Printable privacy cards for every room
5

Property Settings

Review the guest-facing options

Turn on only the optional features that the property wants to use.
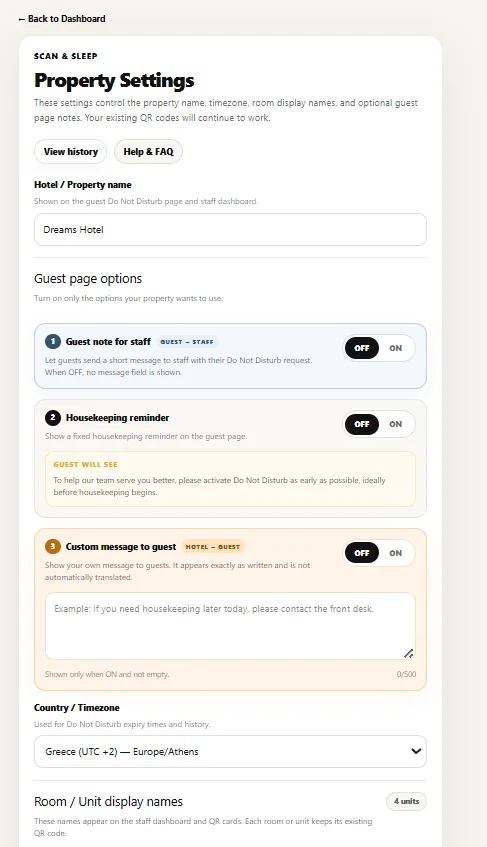
Review the property name and timezone.
Choose whether guests can leave a note for staff.
Choose the housekeeping reminder or custom guest message.
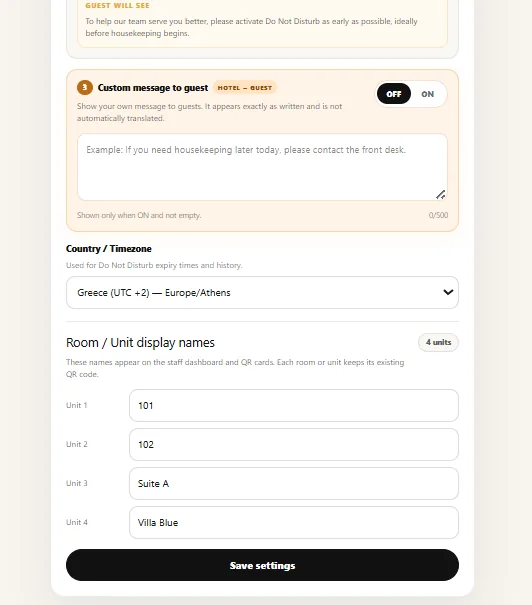
Review the room display names.
Select Save settings.
Scan and Sleep Property Settings options
Guest page options
Room display names and Save settings button
Room names and timezone
6

Final test

Open the Staff Dashboard and test one room

Save the Staff Dashboard on the staff device, then scan one room QR and activate a test Do Not Disturb request.
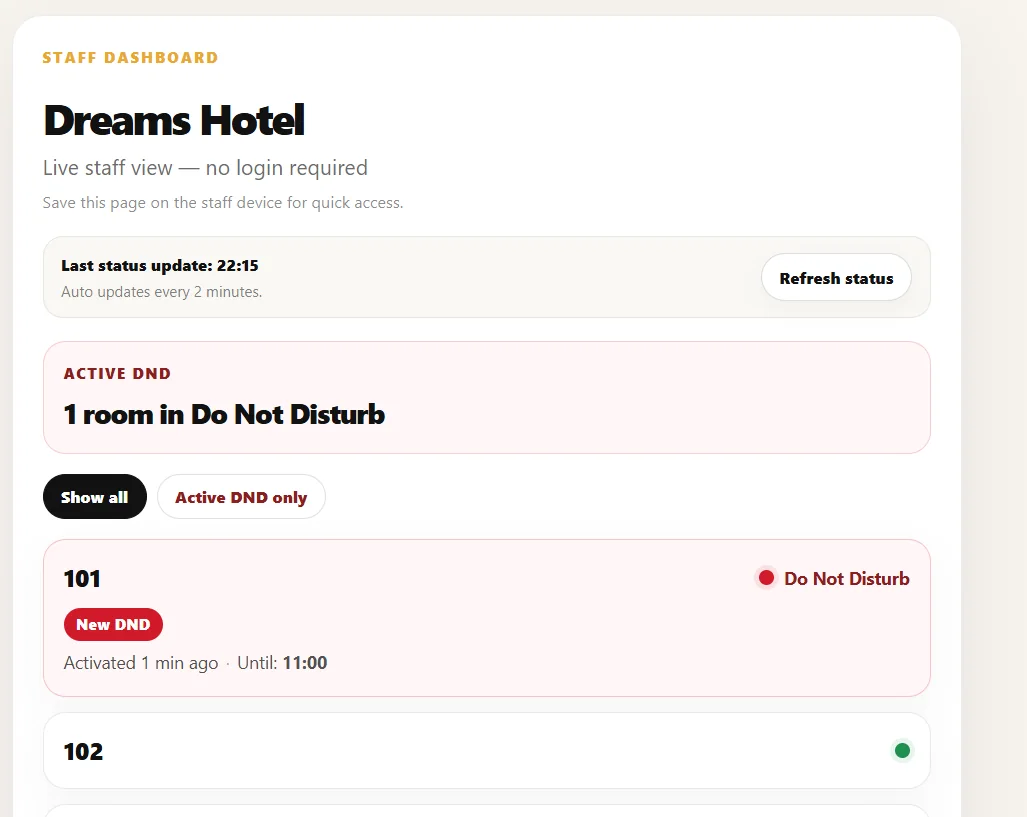
The Staff Dashboard does not require an individual staff login.
Scan one room QR and choose a test end time.
Select Activate Do Not Disturb.
Confirm that the room turns red on the Staff Dashboard.
Confirm that the selected expiry time is displayed.
The dashboard updates automatically and also includes a manual Refresh status button.
Staff Dashboard before a Do Not Disturb activation
All rooms available
Staff Dashboard with one active Do Not Disturb room
Active Do Not Disturb request

Setup complete

Your property is ready

Once every item is confirmed, the QR cards can be placed in the rooms and the staff can begin using the live dashboard.

Owner account confirmed
Property and all rooms created
Correct timezone selected
QR cards printed or saved as PDF
Property settings reviewed and saved
Staff Dashboard saved on the staff device
First Do Not Disturb activation tested successfully